Description
Specification: 100% TESTED 100% WORK AND PASS THE NOISE TEST
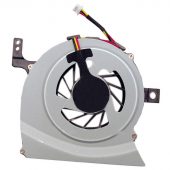
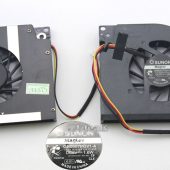
Power: DC5V Bare Fan
Unit: PCS
Condition: Brand New
Warranty: 3 Months
Info: (3-wire) 3-pin connector
Availability: in stock
How to Replace Acer Aspire 5517 CPU Fan
The laptop in this guide is Acer Aspire 5517.
First of all, disconnect the powe adapter and remove the battery.
1. Turn the Acer Aspire 5517 upside down. Remove the 15 screws on the bottom.
2. Remove the HDD cover and the Memory Cover.
3. Remove the screw securing the ODD module.
4. Insert a suitable tool into the access slot in the battery bay as shown. Gently lever the ODD module out of the chassis. Pull the optical drive module out from the chassis.
5. Push out the release latches on both sides of the DIMM socket to release the DIMM module. Remove the DIMM module.
6. Remove the adhesive tape securing the Antenna cables in place. Then disconnect the antenna cables from the WLAN Board. Move the antenna away.
And remove the screw between the DIMM and WLAN Board.
7. Using the pull-tab, slide the HDD Module in the direction of the arrow to disconnect the interface. Lift the HDD Module clear of the HDD bay.
Remove the Switch Cover and the keyboard. Please refer to another post How to Replace Acer Aspre 5517 Keyboard.
8. Turn the Acer Aspire 5517 / 5732Z over. Remove the Antenna Cables from the cable channel as shown. Ensure that the cables are free from all cable clips.
9. Stand the Acer Aspire 5517 / 5732Z on the LCD Panel and pull the Antenna cables completely through the chassis.
10. Disconnect the LCD cable from the Mainboard and remove the cable from the cable channel.
11. Remove the white Antenna cable from the cable channel. Ensure that the cable is completely free of the retaining clips all the way to the hinge well.
12. Remove the adhesive tape securing the Antenna cable to the Upper Cover. Remove the black Antenna cable from the cable channel as shown. Ensure that the cable is completely free of the retaining clips all the way to the hinge well.
13. Press the left side Hinge Cover inward, as shown, and lift to remove the cover from the chassis. Repeat the process for the right side Hinge Cover.
14. Remove the four securing screws (two each side) from the LCD module.
15. Remove the left and right screw covers from on top of the hinges.
16. Lift the LCD Module clear of the Upper Cover.
17. Remove the three screw caps at the rear of the Upper Cover as shown.
18. Disconnect the following four cables from the Mainboard and remove the nine screws on the top panel.
19. Starting at the rear left side of the cover, pry apart the Upper and Lower Covers as shown. Work along the back edge of the casing to the right as shown, then lift the Upper Cover clear of the Lower Cover.
20. Remove the single securing screw from the Mainboard.
21. Lift the mainboard from the chassis, right edge first, Then turn the Mainboard over to access the Cooling Module.
22. If you just want to replace the Acer Aspire 5517 fan only, disconnect the Fan cable from the Mainboard, and remove the three securing screws from the Fan Module. If you want to remove the Thermal Module, remove the four securing screws (in reverse numerical order from screw 4 to screw 1) cycled by green.
Replaces the Following Manufacturer Numbers:
23.N2802.001, DC280006LA0, MG55150VI-Q080-G99
Fits the Following Models:
Aspire 5517 Series, Aspire 5541G Series, Aspire 5532 Series, eMachines eM-E725 Series, Aspire 5541 Series, eMachines eM-E525 Series, Aspire 5732G Series, Aspire 5732Z Series, Aspire 5332 Series, Aspire 5241 Series, Aspire 5732 Series, Aspire 5516 Series, eMachines eM-E625 Series